Using Instax Mini in medium and large format cameras - plus hand developing Instax film
UPDATE!
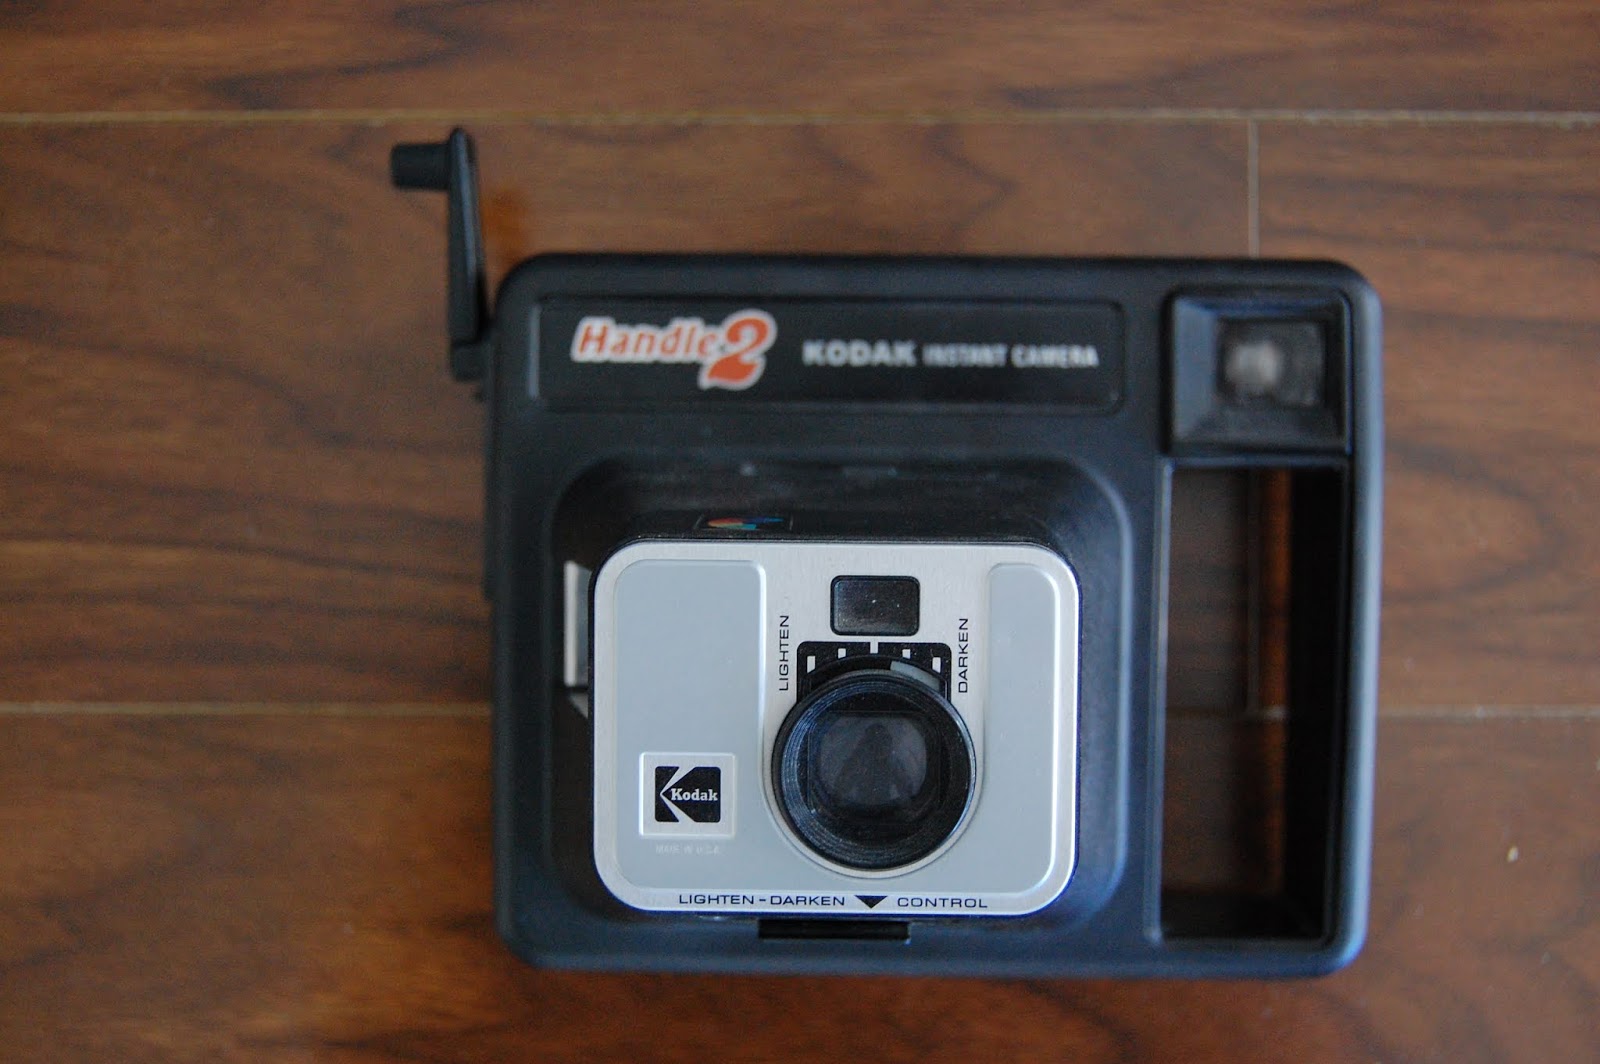
(Feb. 9, 2019 - I recently received a set of Kodak Instant Film/Kodamatic cameras. Specifically, I received four in the "Handle" series. These cameras had manual development with the use of a hand crank on the rollers. They WORK on Fuji Instax Film but the rollers only fit Instax Mini and Instax Square. This new information is at the bottom of this older post.)***************

The image above may tell you all that I've been up to lately.
The thick white border at the bottom is a chemical pack. The narrow format indicates "mini." Yes, my dear Watson, he has been using Fuji Instax Mini instant film in his 6x6 Yashica twin lens reflex camera."
I loaded the Yashica in a windowless bathroom at night and it worked.
The real problem ended up being development. In the video above, J. Caldwell reloaded the film back into an Instax Mini film back and then processed the film through a proper Instax Mini camera.
I didn't have one. Instead, I went back to the dark bathroom and edged the film, pod first through rollers from a Fuji PA-45 4x5 instant film film back.


Also, I took a while to get even a passably well-developed shot. I have yet to get an even spread of the developer across the whole of the film surface. I found it worked best with the rolling unit on my belly and I pushed the film towards me. Working the top roller with your thumb can help ease the development pack through (it must go in first!).

All of this was practice, however. What I really wanted was a pic of the twins. For that, I loaded a 4x5 film holder with two Instax Minis. I put the development pods at the bottom so that when I put the film holder in they would be at the top (where the bottom of the image would strike as cameras see things upside down and mirrored [?]). Anyhow, this is how I loaded it. Note, the exposed side IS NOT the picture side. The exposure side is the purple and grey part. But we look at the image from the white border side. Which I suppose, takes care of the whole mirroring problem.
Also note, Instax Mini are too small to use the runners at the top and bottom of a 4x5 film holder. I had to tape the film down and make sure the dark slide did not catch on either of the Minis.

Note in the 4x5 film holder, the Instax Mini film is loaded grey side up, ie facing you. The grey side is bulgier. In the dark or the dark bag you should be able to feel which side is the white/front side and which side is the grey side (which is the side you expose).
When you load the film holder into the camera, the film will be upside down because the image will be upside down (cause that's how lenses work).
Anyhooooo...
I exposed the film, put back the dark slide back, dashed into the washroom and hand-developed the film, ie jammed them through the PA-45 rollers.
Here's how they turned out. Not perfect, I took it this morning and I have a print.

Next step will be Instax Wide once I figure out a good way to develop the film by hand.
If you want to see a video of Instax Mini being load into a sheet back...this is a good one.
---------------------
Interesting discovery, you can expose Fuji Instax film from either side. I think the white side is FASTER and has an ISO of 1000 or 1200. Pure eyeball guessing. It will be a mirror image. My self-portrait (very top image) was exposed on the white side. I'm sure of it though the lettering is still mirrored. Oh well, I'll have to double check it all.
The dark grey/purple, which I think of as brown side (probably me holding onto negative process film paradigms), shoots at the actually rated ISO 800.
------
Oh, and here's the camera I used to make the picture of the boys, a Burke and James 4x5 Press Camera with a Rodenstock Ysarex 127mm f4.7 from a Polaroid 110a camera.

----------
THE UPDATE PART! FEB. 2019

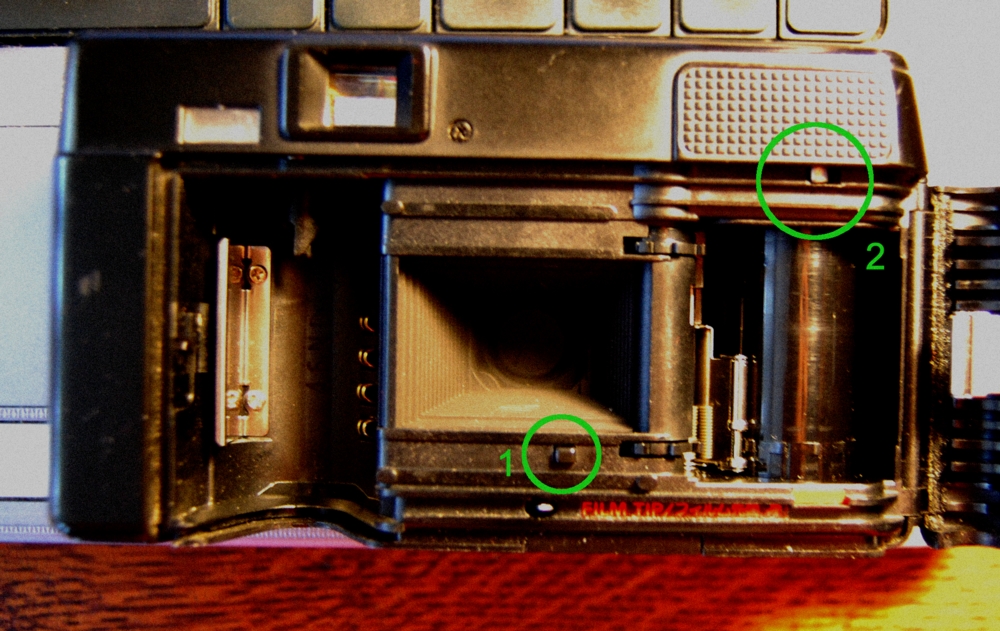
As I mentioned (in a Feb. 2019 post) I recently received four Kodak Handle type cameras. And I can confirm that Instax Square and Instax Mini will hand develop with hand-cranked Kodak instant film cameras.
They came with all sorts of names - so look for the little crank. That's the ticket. To understand how to load and develop Instax in a Kodak instant camera check out Petapixel's article and PhotoChemicals clever Youtube video:
Below are three of my new Handle-type cameras. Note the swinger vibe of some of the camera names.


Comments
Anyhow, I've been getting back into this particular project especially since there are packets of monochrome wide at my local drug store.
I'm looking at the rollers for the PA-45 Film Back. I could knock out the pins and drill new holes to have them closer together. That's actually the problem. They're not close enough together.
But I'm on it again. I'll try to post with a solution soon. It's been too long. My best, and thanks for your question.
I have just started this journey as well and excited about using my old cameras.....I often shoot paper in them....so with instant film...its instant and analogue. Today I bought a Jamie Oliver pasta roller and shot some instant film in a 120mmm film holder on my Sinar 4 x 5. Placing the film in a smooth plastic sleeve and enveloped in paper worked well but squashed dark dye out the end.....the best ones were these 1st ones....as I reduced pressure to try and eliminate the squashing dye out the results were less successful. I slowed it all down thinking I was rolling too fast........but it was after work and the best light was gone........I will have to play another day. Tonight I will try and read everyones learning and think artound solutions. I have an instax I can put it in but would like to do it without it. I kept the opened film cassette in a developing tank and sitting in the darkroom....it all seemed do able. I am excited and just need to get that balance. Appreciate your blog and videos. I will be back.